Cleaning your dog’s ears is not just a grooming routine—it’s a necessary part of their health care. So, let’s find out how to clean your dog’s ears at home without any fuss!

Whether your dog has floppy ears like a Basset Hound or upright ears like a German Shepherd, all breeds can develop ear issues if you do not clean your dog’s ears at home frequently.
Dirt, debris, and wax buildup can lead to infections, discomfort, and in severe cases, hearing loss. Regular ear cleaning in dogs helps maintain ear health, prevents infections, and allows you to spot any potential problems early on.
By incorporating ear cleaning into your dog’s grooming routine, you’re keeping them healthier and happier. If your dog is particularly fidgety or unwilling to get their ears cleaned at home, you can always book grooming appointments with experts and complimentary post-grooming consultations at the nearest veterinary clinic.
Items You’ll Need for Cleaning Your Dog’s Ears
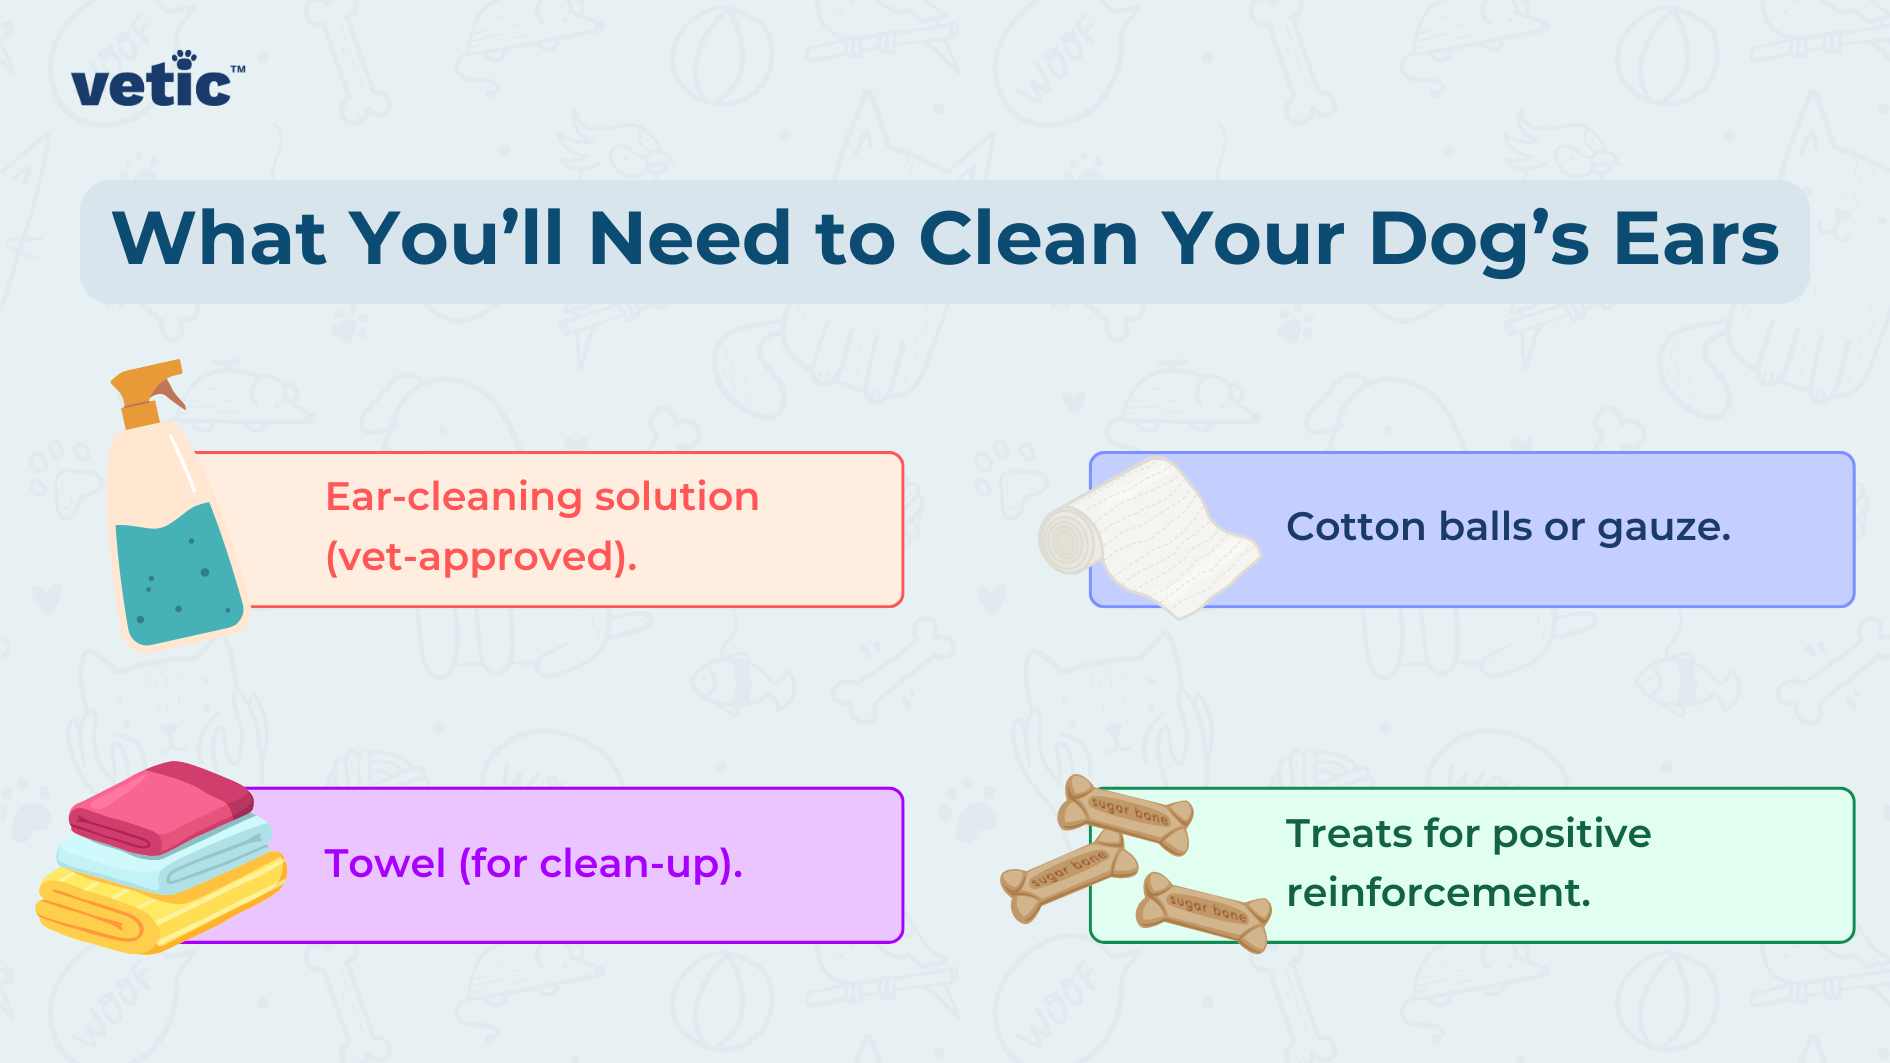
Before you start cleaning your dog’s ears, it’s essential to have the right equipment. Here’s a checklist of what you’ll need:
- Ear-cleaning solution: Choose a veterinarian-approved ear cleaner. Avoid using homemade solutions unless prescribed by a vet. Do not buy unprescribed ear cleaners from ecommerce sites!
- Cotton balls or gauze: These are gentle on the ear and help wipe away debris and excess cleaner. However, don’t press cotton balls deep into your dog’s ears.
- Towel or Old but Clean T-shirt: It’s a good idea to have a towel or an old cotton t-shirt on hand to clean up any mess, as ear cleaning can sometimes get a bit wet.
- Treats: Positive reinforcement will help your dog stay calm and associate ear cleaning with a positive experience. It can be their favourite treats or food!
Avoid using cotton swabs or Q-tips, as these can push debris deeper into the ear canal, potentially causing more harm.
Step-by-Step Guide to Cleaning Your Dog’s Ears at Home
Cleaning your dog’s ears is a relatively straightforward process, but it requires patience and gentleness to avoid causing discomfort or injury.
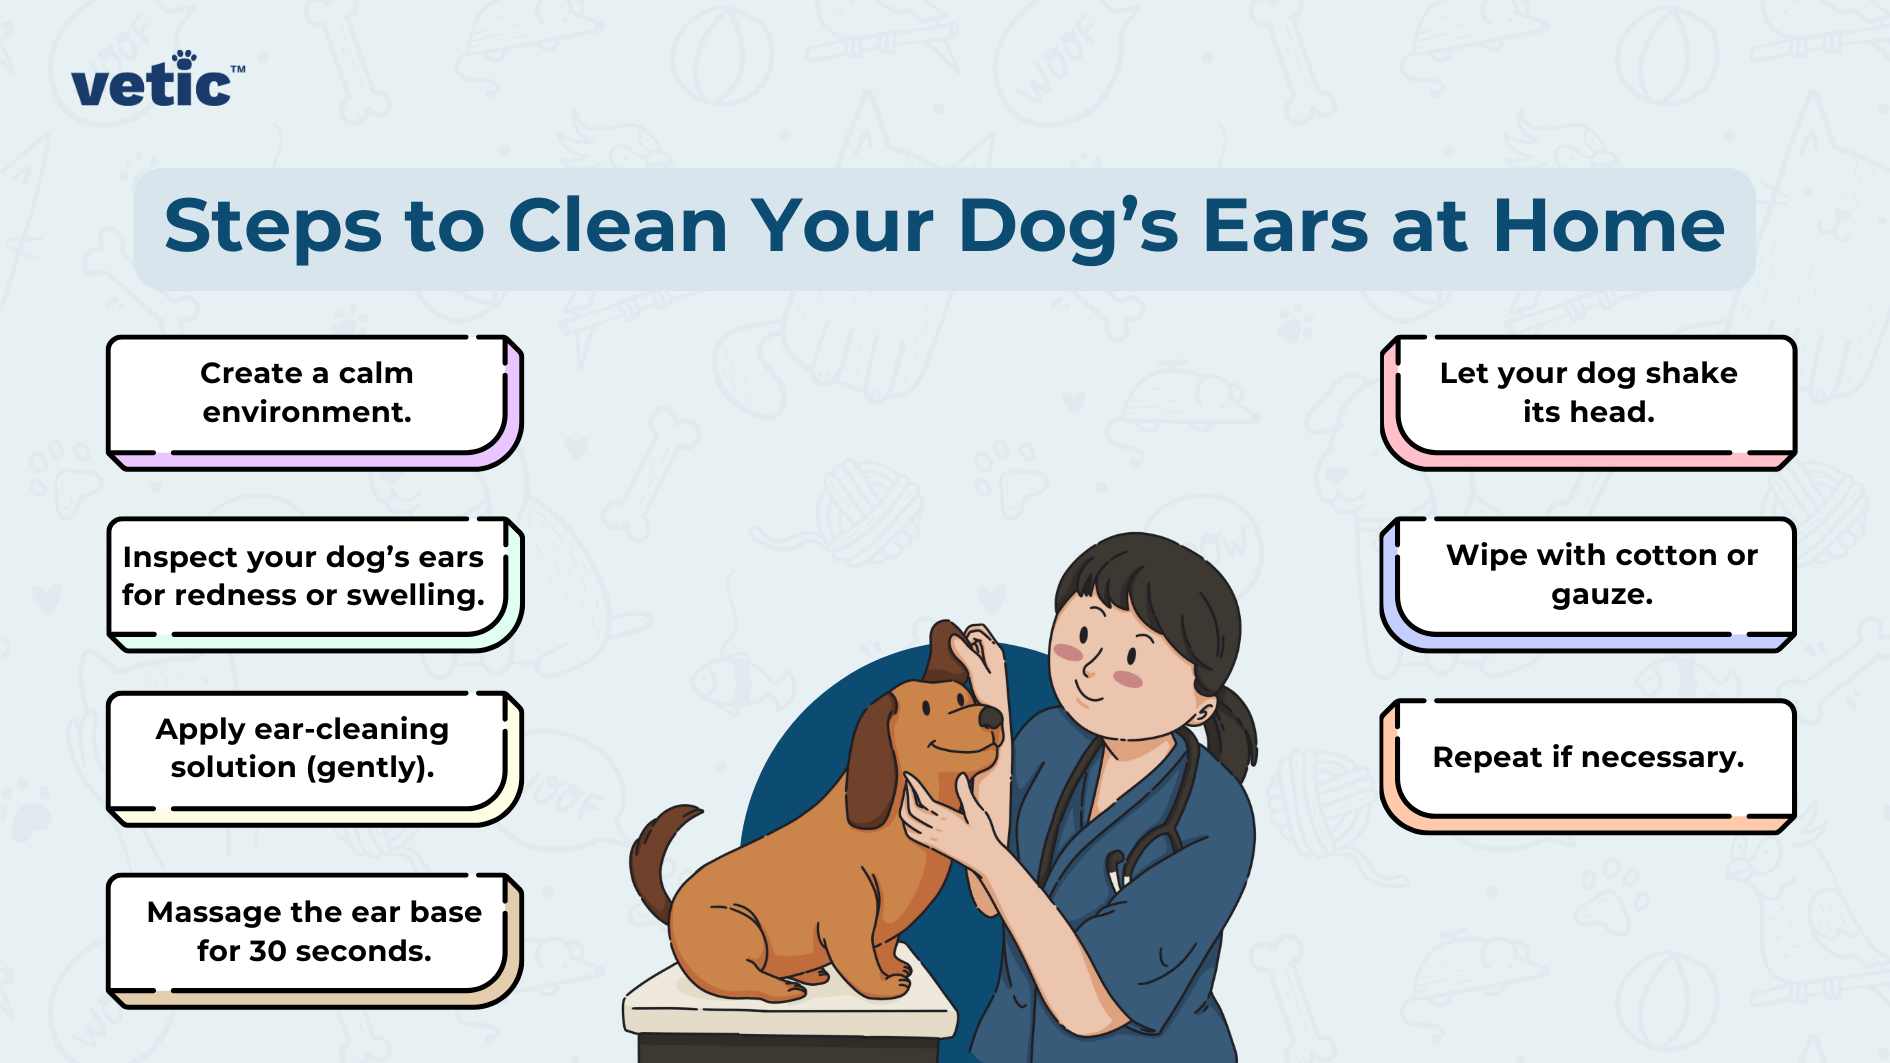
1. Create a Calm Environment
Start by finding a quiet place to clean your dog’s ears. Sit beside your dog and make them feel comfortable. Pet them, talk softly, and offer a treat before starting to make the experience more pleasant.
2. Inspect the Ears
Gently lift your dog’s ear and look inside. If you see redness, a bad odour, or excessive wax buildup, it may be a sign of infection, and you should consult your vet before proceeding with cleaning.
3. Apply the Ear-Cleaning Solution
Hold your dog’s ear flap upright and carefully squirt a small amount of the ear-cleaning solution into the ear canal. Avoid inserting the nozzle too deeply. Once the solution is in, gently massage the base of your dog’s ear for about 30 seconds to help the liquid break up any wax or debris.
4. Let Your Dog Shake Their Head
Allow your dog to shake their head. This will help dislodge any loosened debris and excess cleaner from the ear canal.
5. Wipe Away Debris
Using a cotton ball or gauze, gently wipe the inside of your dog’s ear flap and the entrance of the ear canal. Be careful not to push debris further into the ear.
6. Repeat Steps 1-5 if Necessary
If your dog’s ears are too dirty, you may need to repeat the process. Always use a fresh cotton ball or gauze for each wipe.
7. Reward Your Dog
After the cleaning is complete, reward your dog with praise and a treat. Positive reinforcement will make future ear cleanings easier.
Dos and Don’ts of Cleaning Your Dog’s Ears at Home
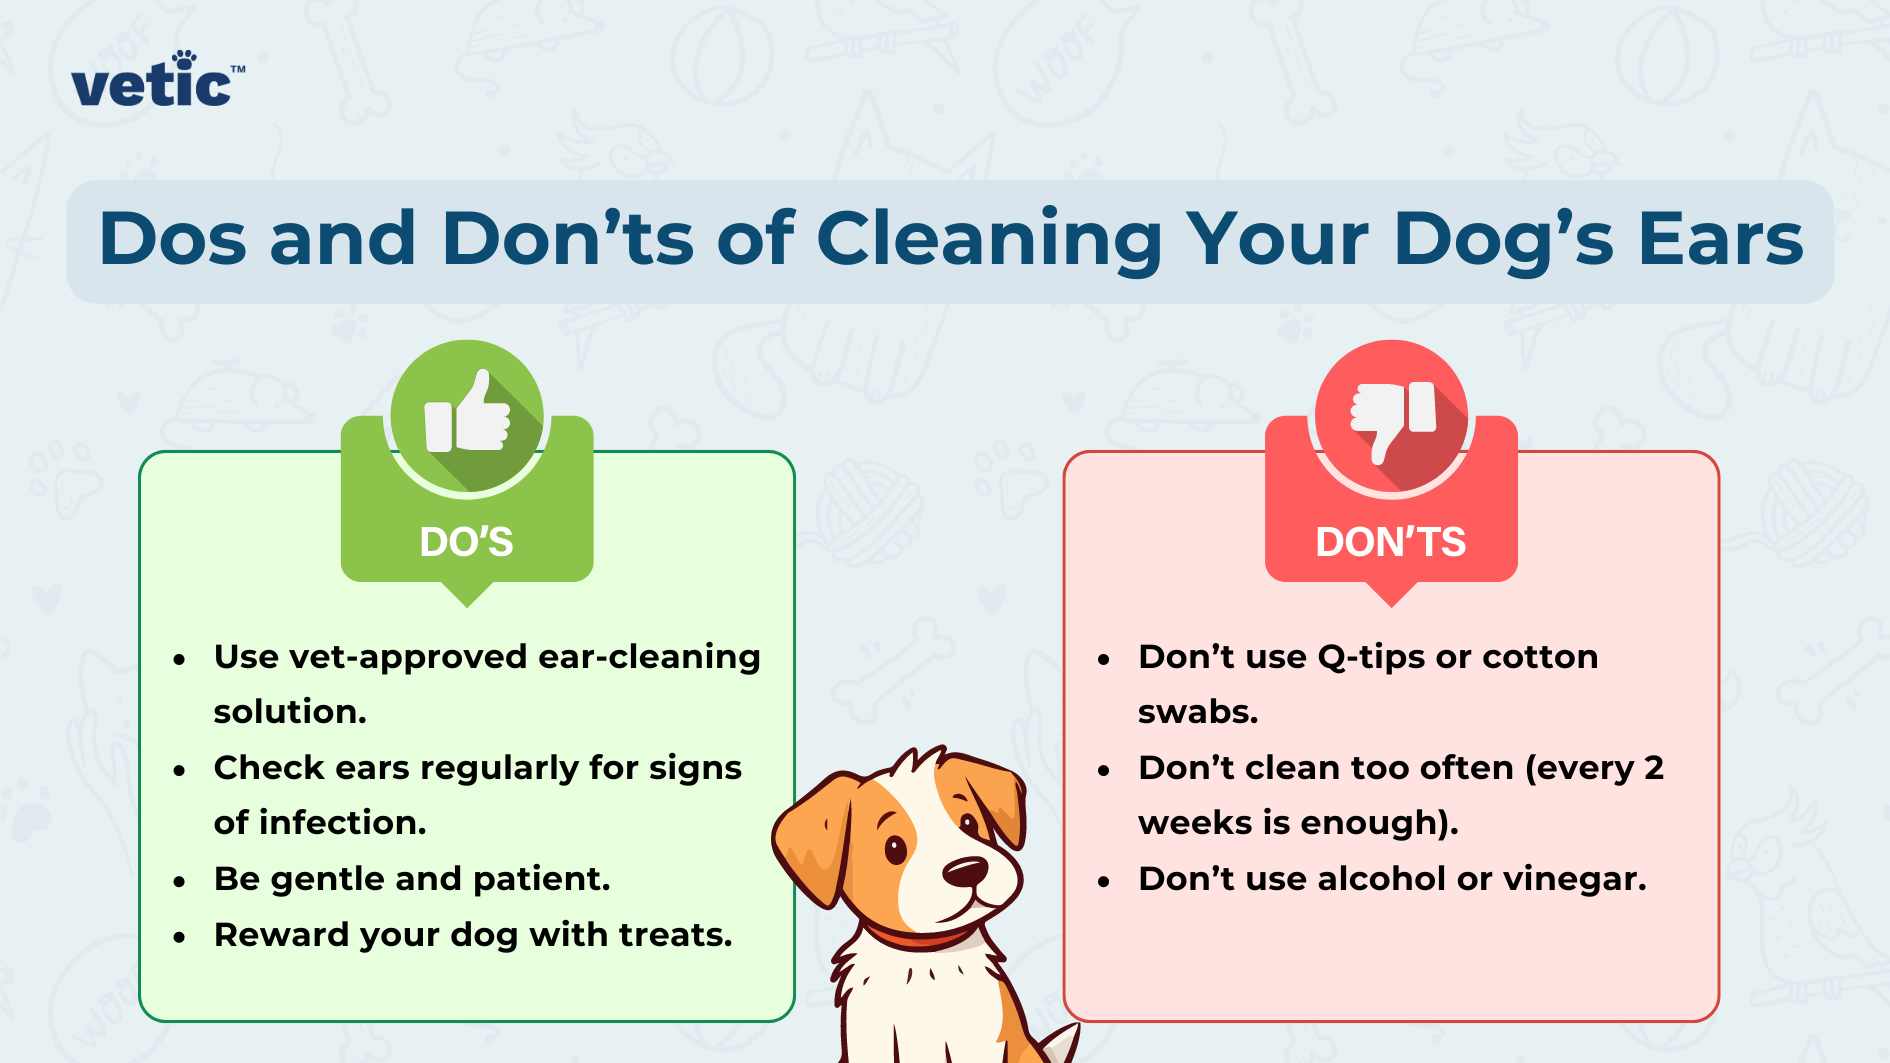
There are some essential guidelines to follow to ensure your dog’s ears are cleaned safely and effectively.
Dos:
- Do use a vet-approved ear-cleaning solution.
- Do check your dog’s ears regularly for signs of infection or excessive wax buildup.
- Do use gentle motions and be patient with your dog.
- Do reward your dog to make ear cleaning a positive experience.
- Do seek veterinary advice if you’re unsure about the cleaning process or if your dog shows signs of discomfort.
Don’ts:
- Don’t use Q-tips or cotton swabs, as they can push debris deeper into the ear canal and potentially cause injury.
- Don’t clean your dog’s ears too frequently, as this can irritate the ear canal. Once every two weeks is usually enough, but this can vary depending on your dog’s breed and ear health.
- Don’t use water, alcohol, or vinegar unless directed by your vet, as these can irritate the ear canal.
- Don’t force the ear-cleaning solution deep into the ear canal.
Why Regular Ear Cleaning is Crucial for All Dogs
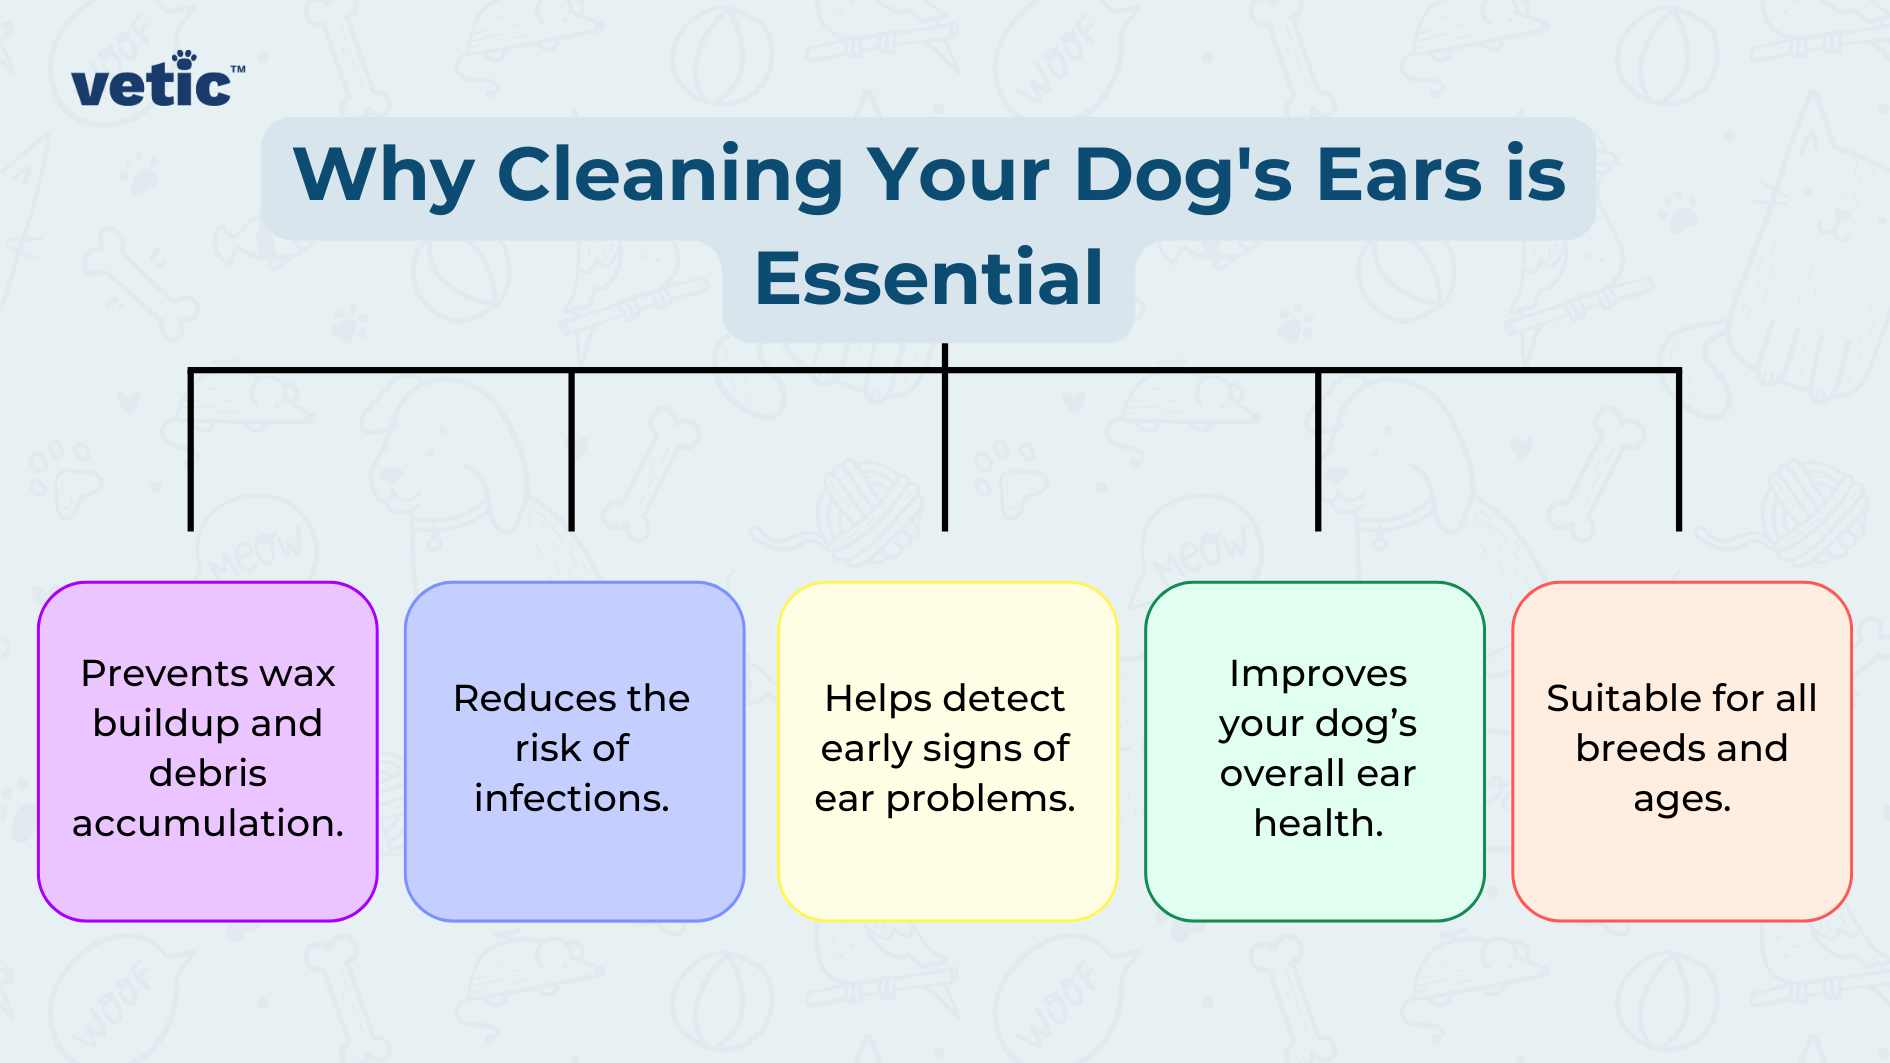
Failing to clean your dog’s ears regularly can lead to the accumulation of dirt, wax, and moisture, creating the perfect environment for bacteria and yeast to grow. This can result in painful ear infections that require veterinary treatment.
Breeds with floppy ears or dogs who swim frequently are especially prone to ear infections because their ears can trap moisture more easily.
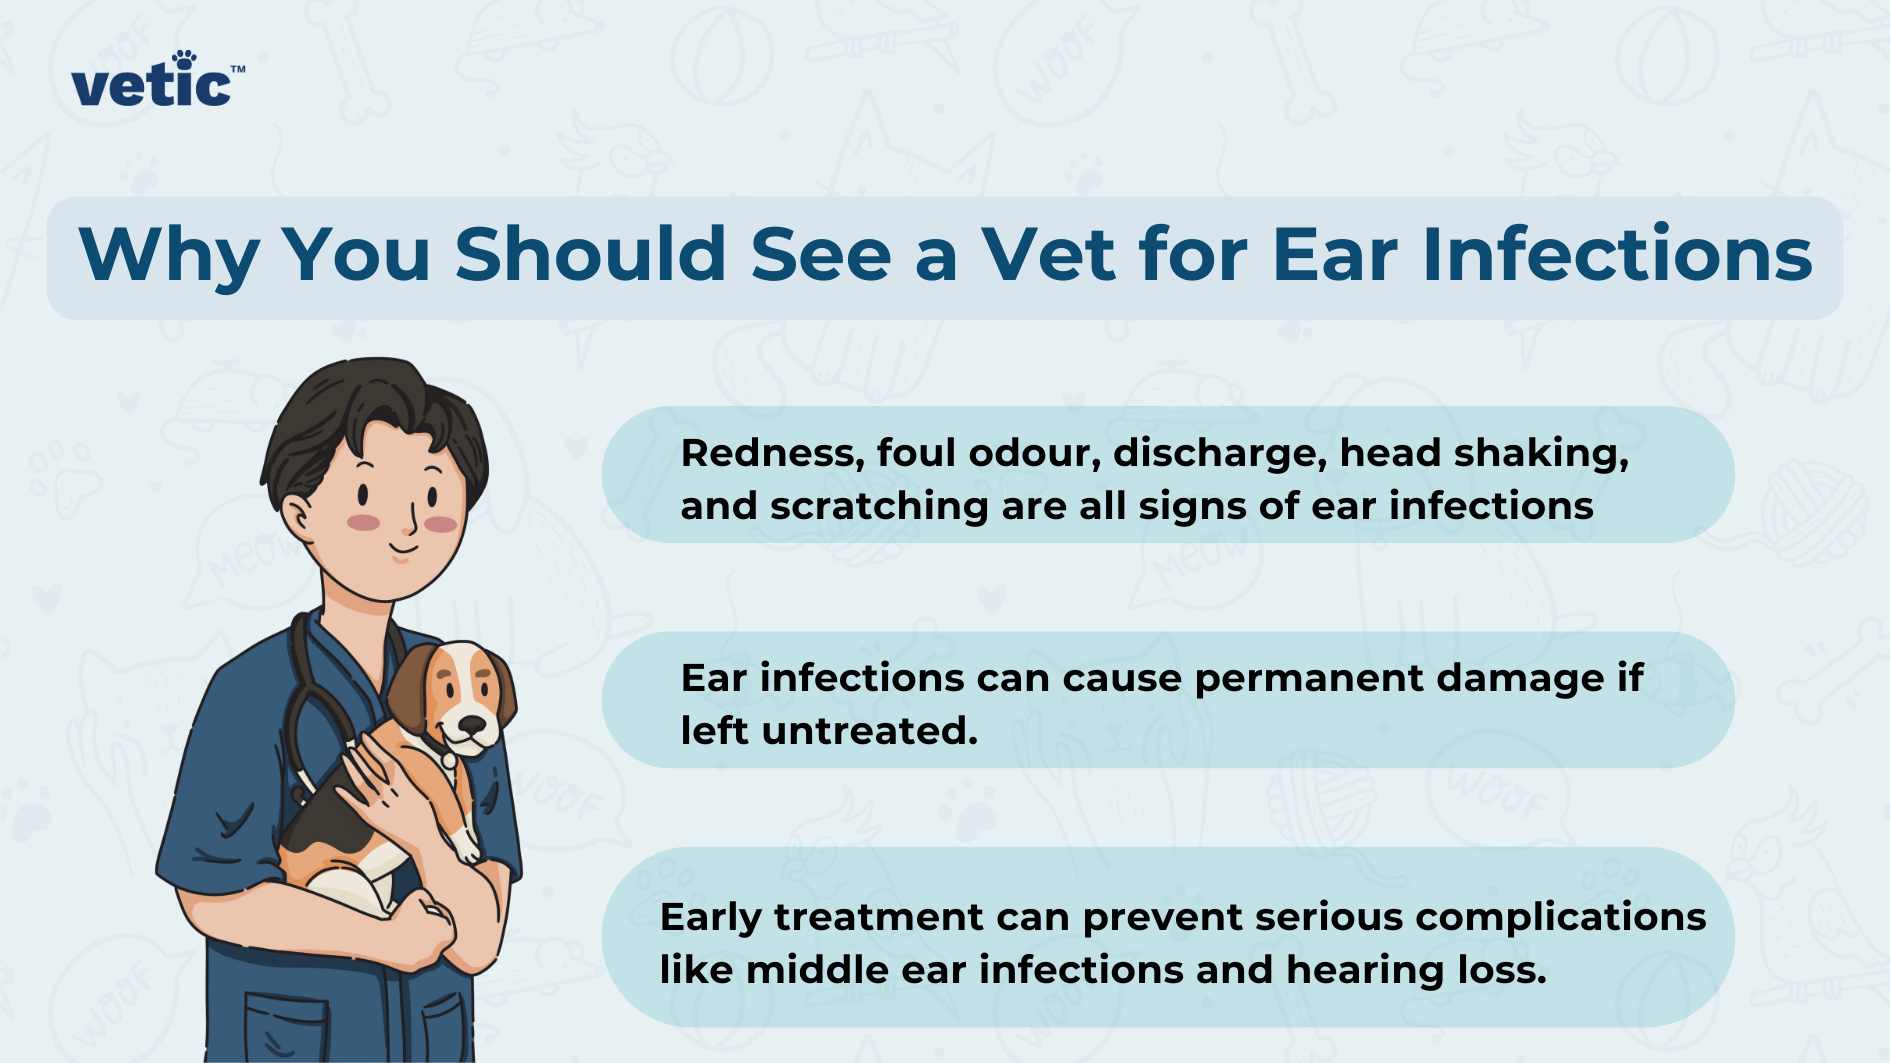
Signs of an ear infection include:
- Redness or swelling
- Foul odour
- Excessive wax buildup
- Scratching at the ears or head shaking
- Discharge from the ear
- Sensitivity when touching the ears
If you notice any of these symptoms, it’s important to consult a veterinarian immediately to get a proper diagnosis and treatment plan.
How to Clean Your Dog’s Ears If an Infection is Suspected
If your dog is showing signs of an ear infection, avoid cleaning the ears yourself before consulting a vet. Infections may require specific treatments, such as antibiotics or antifungal medications. Cleaning an infected ear without veterinary advice could worsen the condition or cause further discomfort to your dog.
However, if your veterinarian recommends cleaning the ear as part of the treatment, follow their instructions closely. This may involve using a medicated ear-cleaning solution specifically designed to treat infections.
- Administer Medication If your vet has prescribed ear drops or medication, apply them as directed after cleaning the ear. Be sure to follow the dosage instructions carefully.
- Monitor Progress Keep a close eye on your dog’s ears during the treatment period. If symptoms worsen or don’t improve within a few days, reach out to your vet again for further advice.
Why Ear Infections Are Dangerous for Dogs
Ear infections in dogs can become serious if left untreated. Chronic ear infections can lead to permanent damage to the ear canal, hearing loss, or even more severe conditions like middle or inner ear infections, which can affect your dog’s balance and overall health. Additionally, the discomfort from ear infections can cause your dog to scratch or rub their ears excessively, leading to secondary issues such as ear hematomas (blood-filled swellings in the ear flap).
That’s why it’s so important to seek veterinary attention as soon as you suspect an infection. Prompt treatment can prevent more severe complications and help your dog recover quickly.
Conclusion
Cleaning your dog’s ears is an important part of keeping them healthy and comfortable. By regularly checking and cleaning their ears, you can prevent infections and ensure any issues are caught early. However, if you notice signs of infection, it’s crucial to consult a veterinarian to avoid more severe health problems. Keeping your dog’s ears clean and healthy will not only help them avoid discomfort but also improve their overall well-being.